Setting Up Your API Hacking Home Lab
Introduction

In this article, I’m going to be showing you how you can set up your API (Application programming Interface) hacking home lab to practice API hacking and uncovering vulnerabilities in API applications. As I’ve written in my previous article which can be found here API’s are a goldmine for attackers and learning how to test them as a pen tester would set you apart and as a developer, it would help you understand how to prevent the API’s you write from vulnerabilities. The vulnerable API is the popular crAPI which stands for completely ridiculous API developed by OWASP. There are other vulnerable API’s you can set up also such as VAPI etc.
Operating System (OS)
The first thing you need obviously is an OS, in cybersecurity and ethical hacking we use the Linux OS because of it’s versatility and in built security tools. Nevertheless, don’t worry if you are a windows user, there is a way of using another operating system like Linux on your host OS either by a process called virtualization or using WSL which is short for Windows Subsystem for Linux - a simple way of using Linux straight from your command line. I’m going to be using the WSL and I’ll attach links to how you can easily set it up. If you prefer using a virtual machine to set yours up, here is a YouTube video to get you started with setting up a virtual machine. Or you can just host the application on your Windows machine using docker.
Setting up crAPI
After you have set up your WSL or virtual machine, the next step is to get the crAPI app from the github and then clone it on your machine
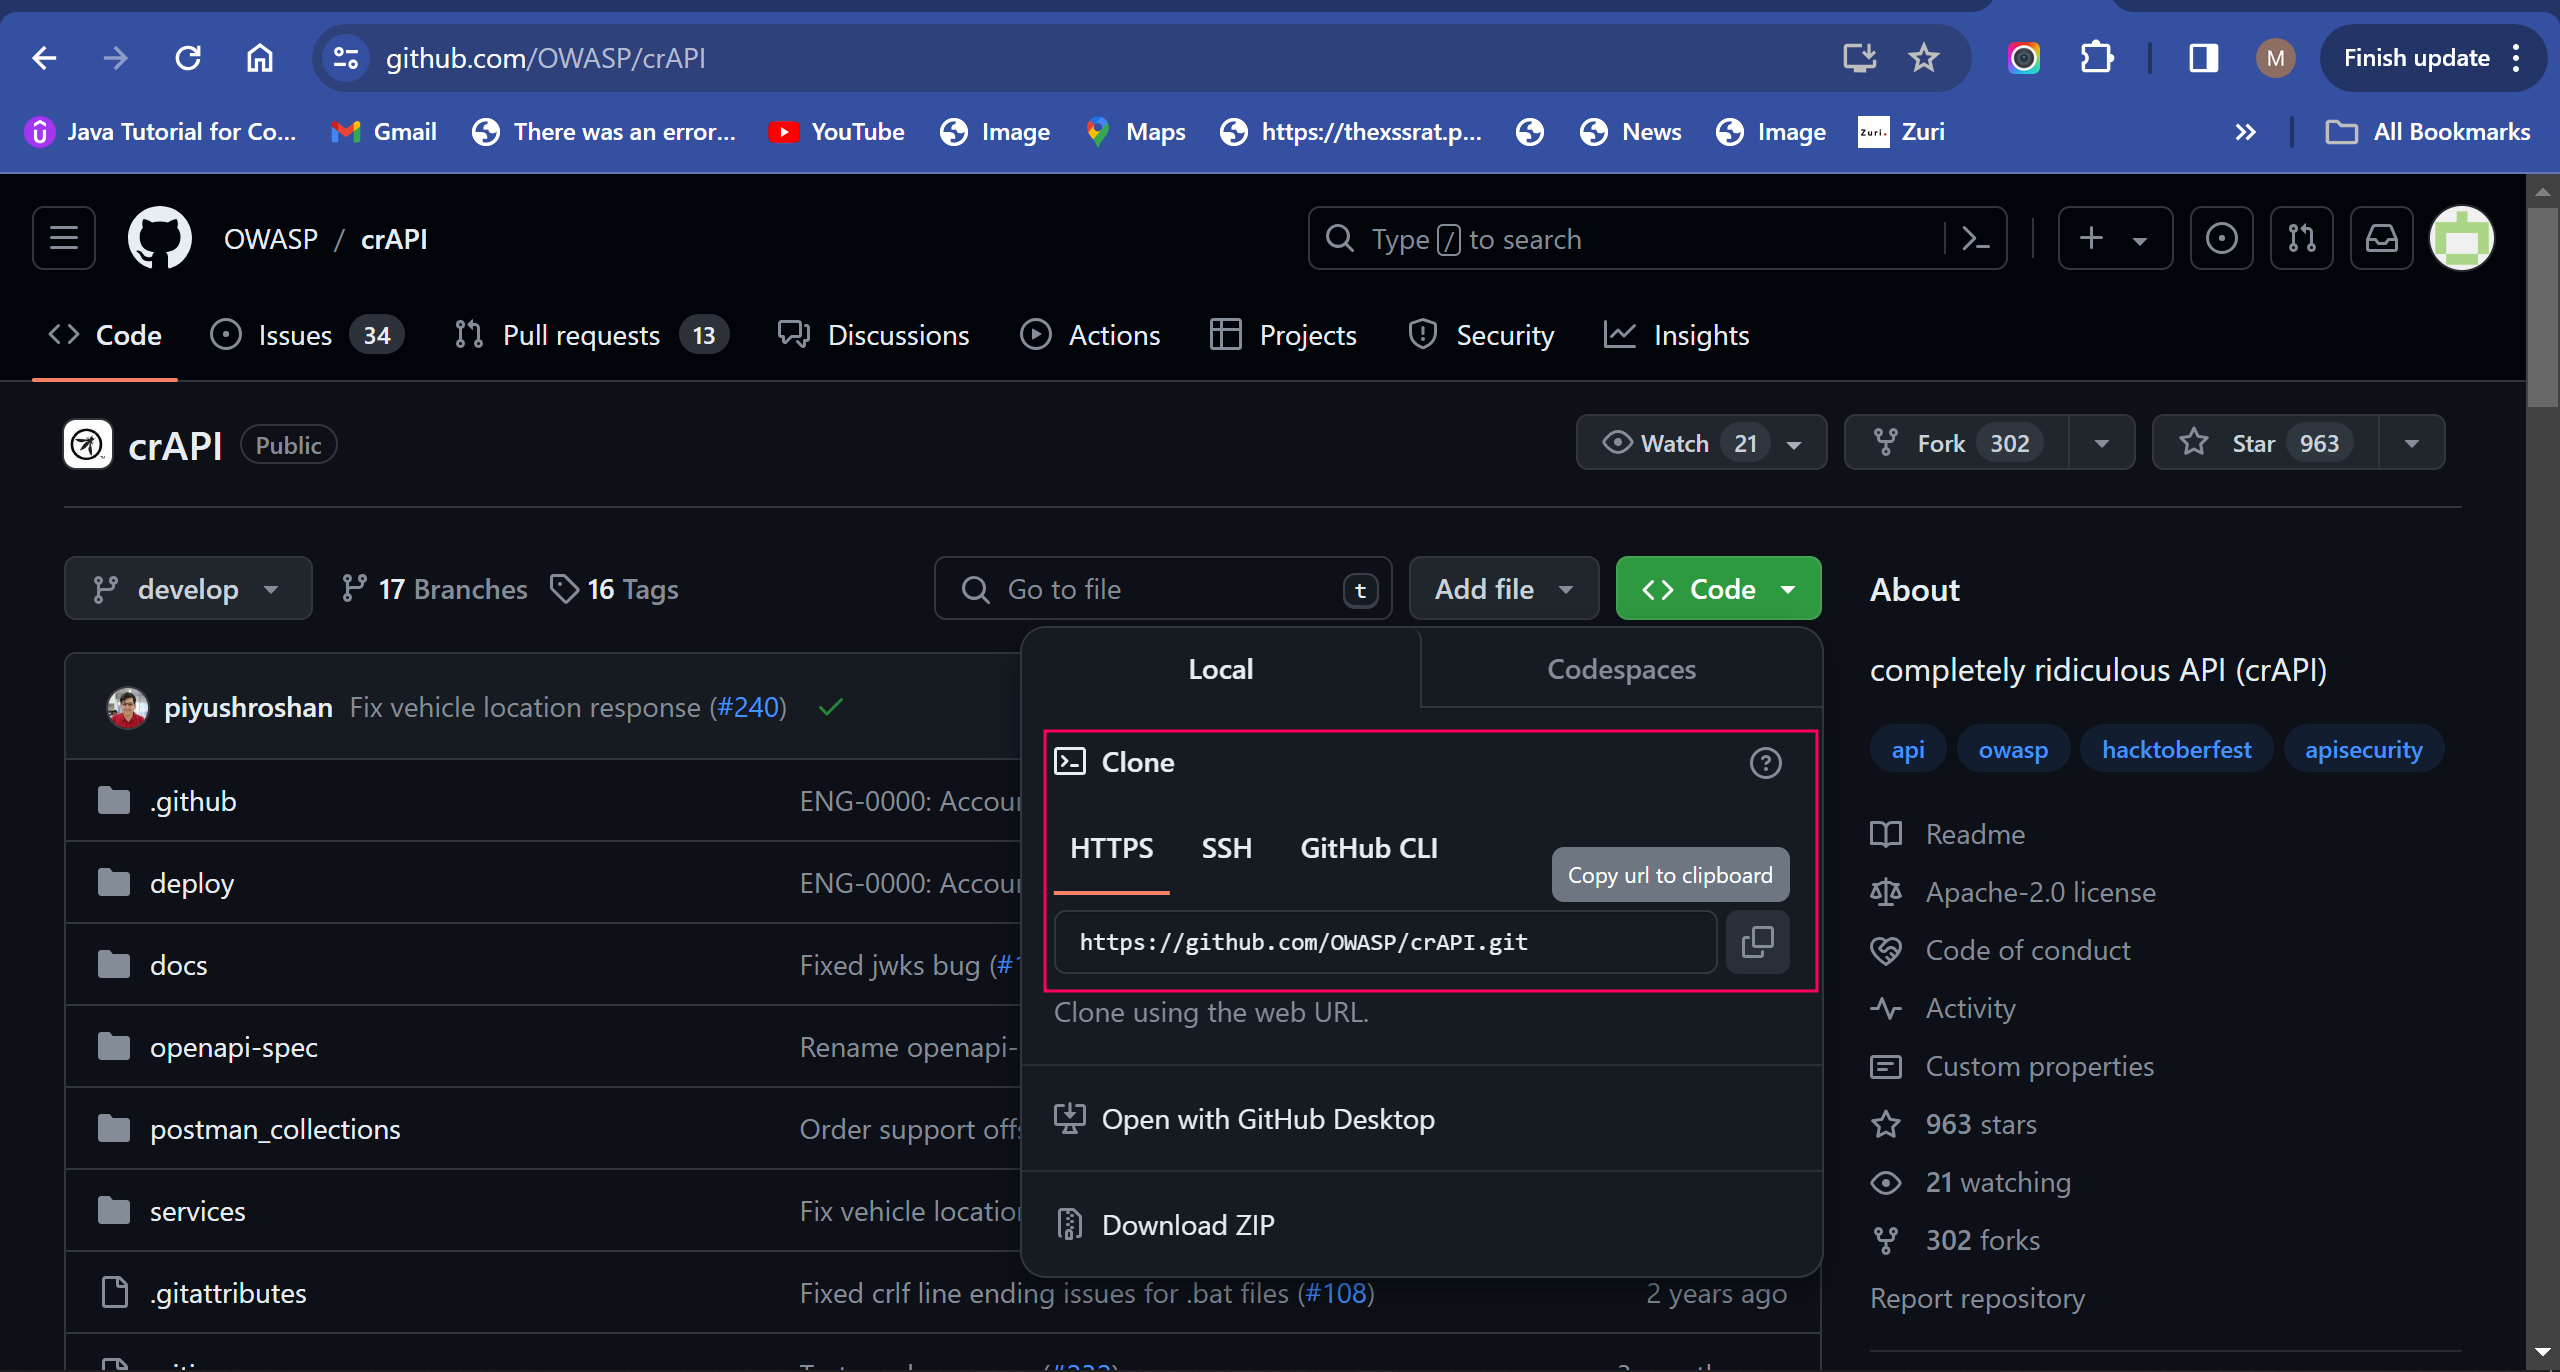
click the green icon with code written on it then copy the HTTPS URL.
Proceed to your command line either on your virtual machine or WSL environment. use the git clone command to clone the repository to your machine :
1
git clone https://github.com/OWASP/crAPI.git
After running the command, you should see the following run on your system.

I believe you should know how to use the Linux commands, but if you are an absolute beginner, here are some links that can help you learn Linux After cloning the repository, the next thing to do is to have docker installed. Docker is used to host containers and applications, so we’d be using it to host our crAPI on our system. Use the following command to install docker on your machine:
1
sudo apt install docker.io
After running that command with no errors hopefully, proceed to installing the next docker component. Should you encounter any errors, google the error or just ask chat-gpt (:
The next command to run is :
1
sudo apt install docker-compose
After installing docker, we can now go ahead to run our application.
Navigate to the path where you have your crAPI installed , for example mine is in my downloads folder . You can do this with the command :
1
cd crAPI
After you’re in the crAPI directory , navigate to the /deploy/docker sub-directory.
1
cd /deploy/docker
When you’re in this directory, run the command
1
sudo docker-compose up
OR
1
 docker-compose -f docker-compose.yml --compatibility up -d
This command will start building the crAPI application and all the dependencies it needs to run. It should start pulling containers and should look something like this:
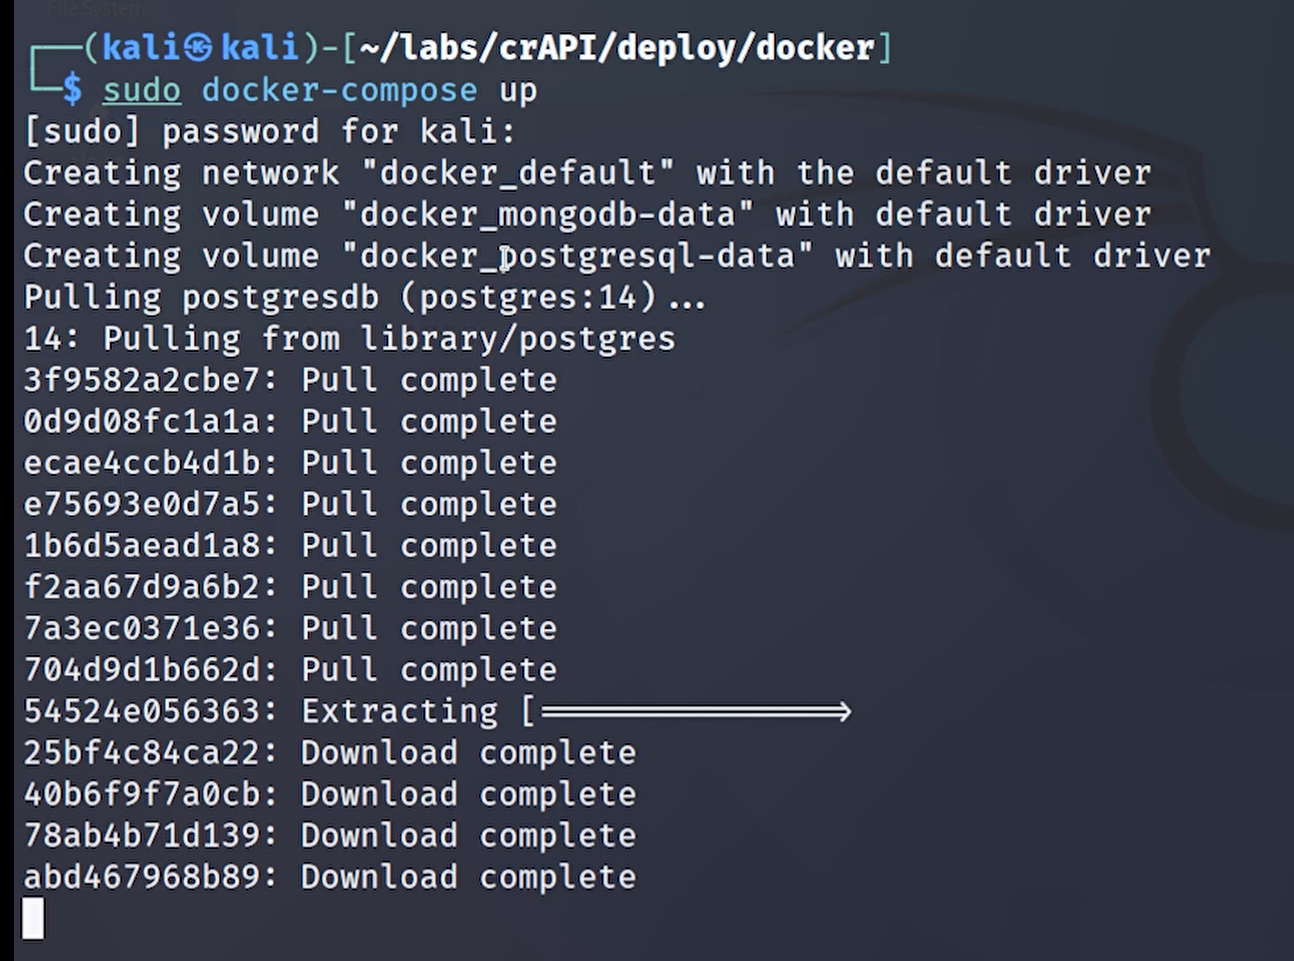
This process would take a while, after it has finished building it should say the machines are healthy or have started

If all the commands have run perfectly without any errors , you should now be able to access the application on your browser. To get access to the IP address, check the docker-compose.yml file in the crAPI directory with a text editor. The IP address should be at http://127.0.0.1:8888 and there is also a mail service which manages authentication and allows you login to the application , it should be accessible at http://127.0.0.1:8025 . Navigating to the IP address should give you this webpage :
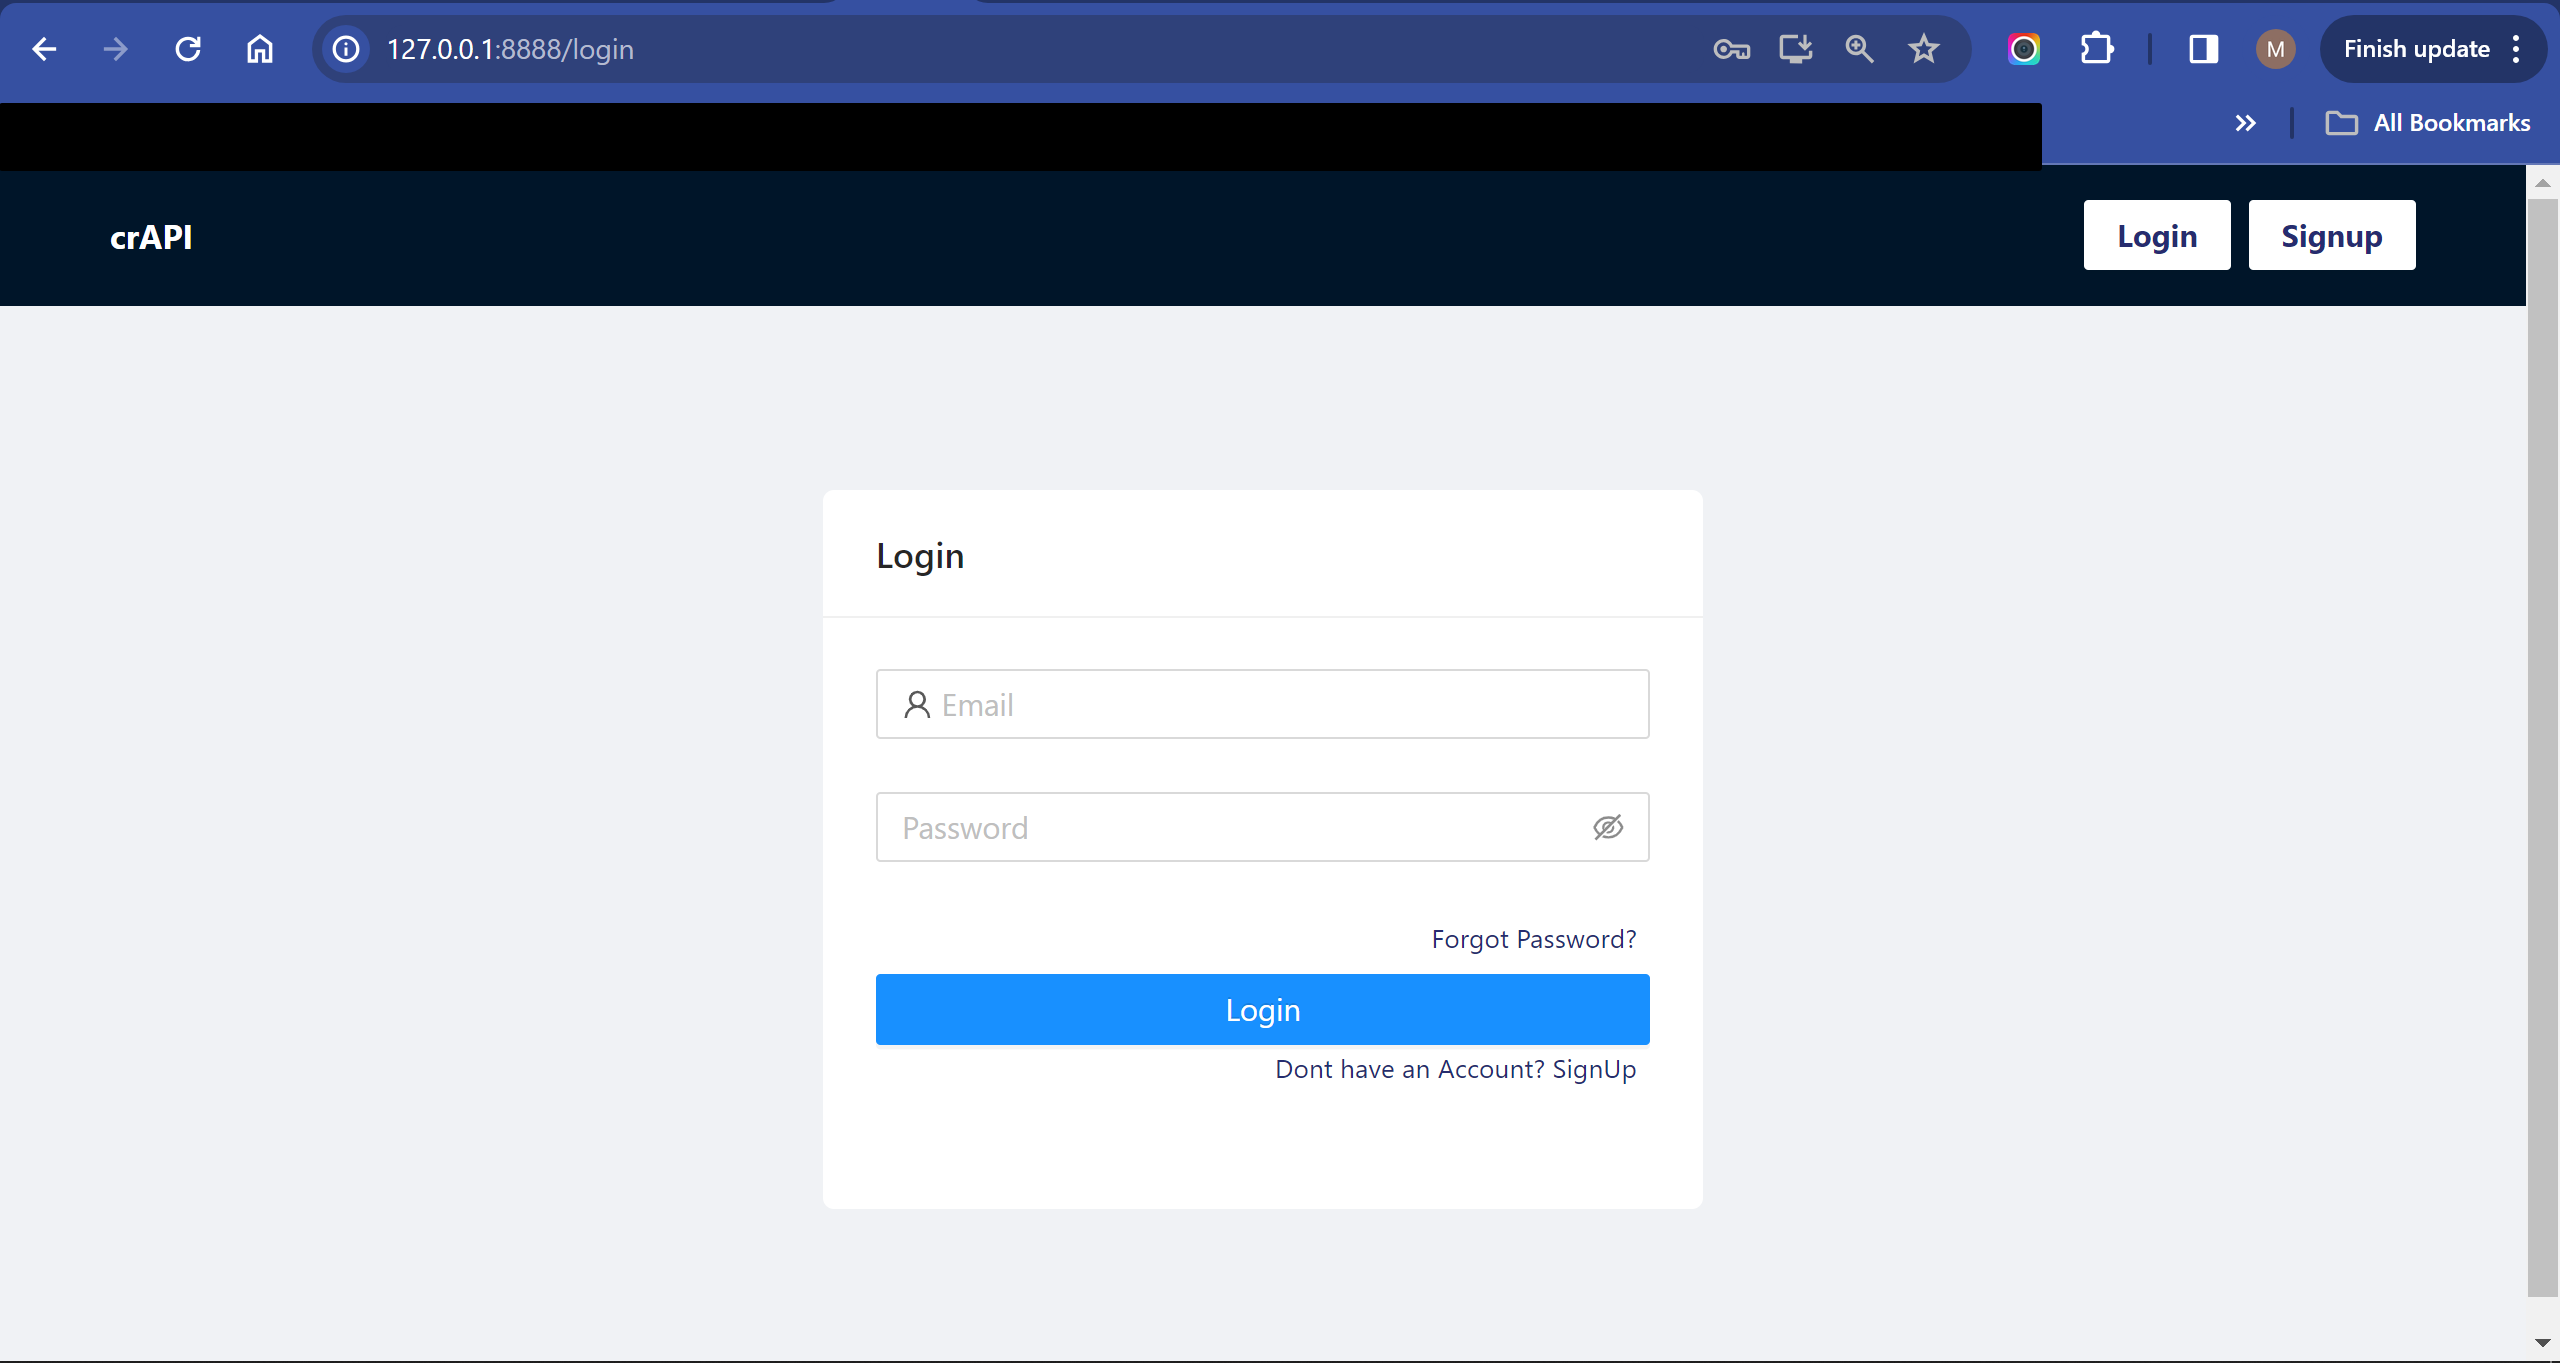
and
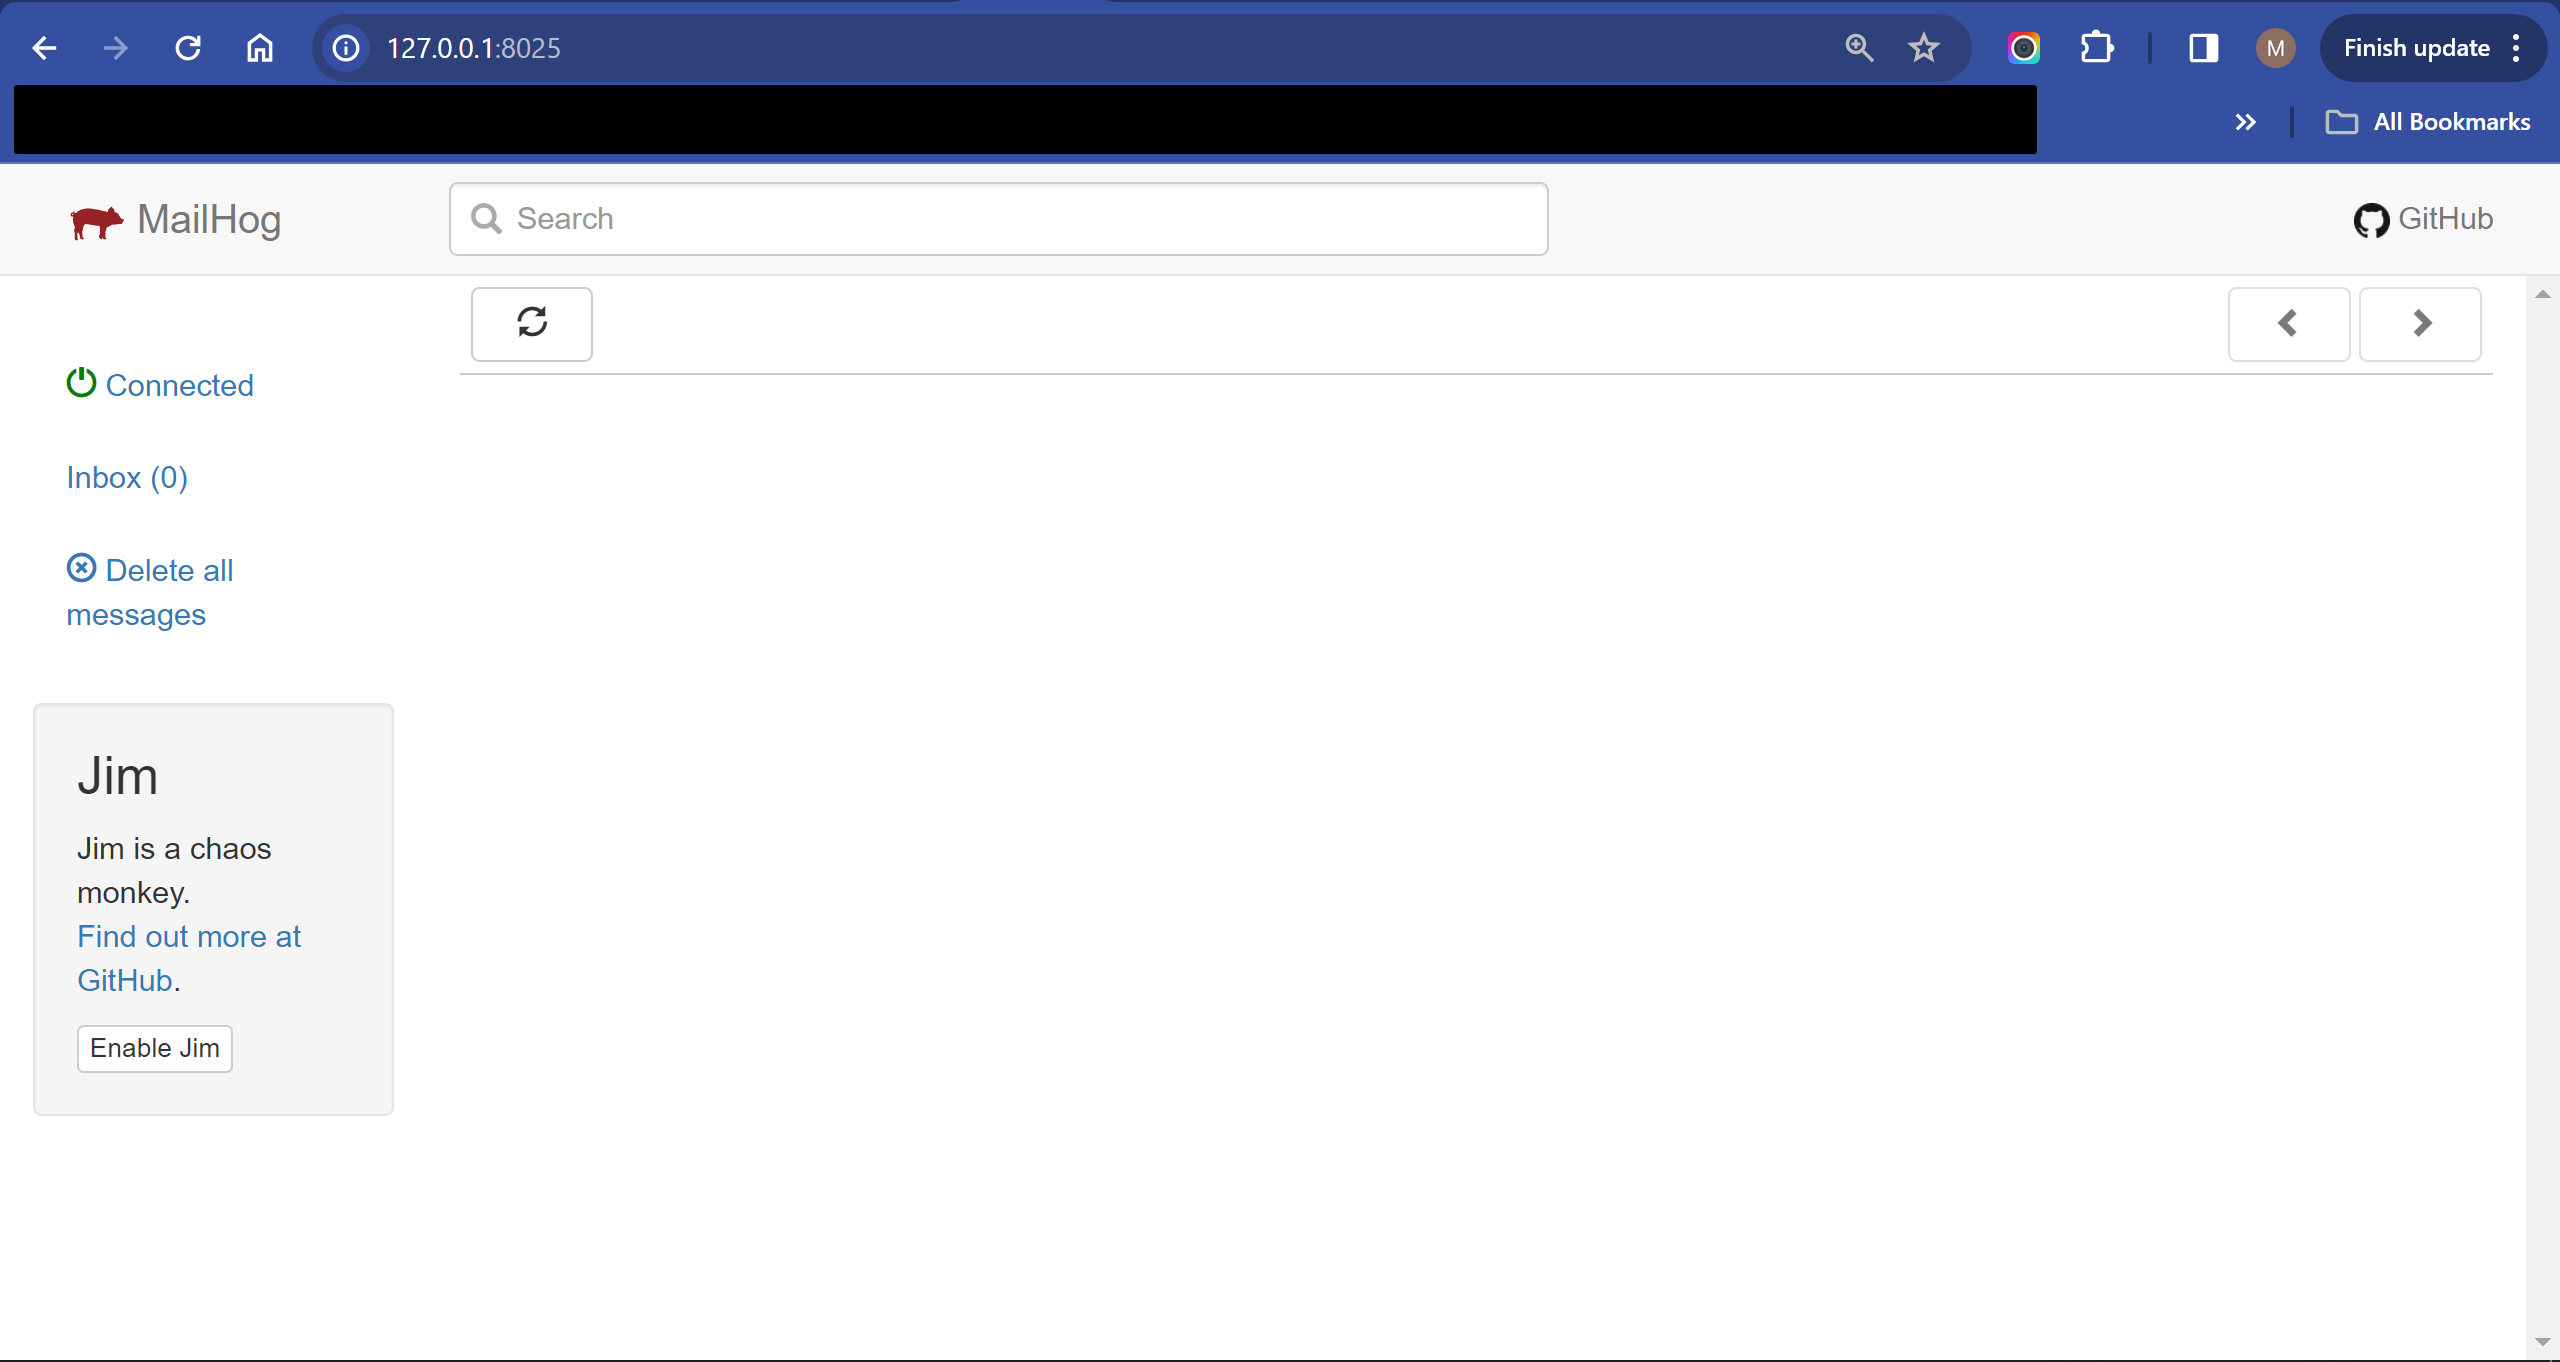
Congratulations! You have now setup an API application to start unearthing those vulnerabilities. Login to the application and start testing (: